Want us to give you a quick tour of the Zenland application? This way you will know its major components and what those are for. To illustrate, we’ve added screenshots to give you a sneak peek of what these components look like.
Login page
You may have already seen it, and the Zenland login page is no different from the login pages of other decentralized applications. No email, password, or other confidential information is needed. At this point, only Metamask accounts can be connected.
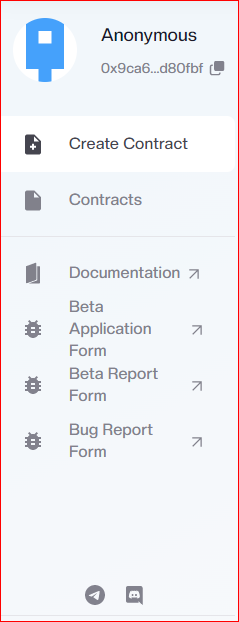
Navigation panel
You may call it differently, but its function is to let Zenland users quickly access the main pages of the escrow app. The first one – the “Create Contract” page is open by default once the user has logged in. You will see the navigation panel is on your left. During the beta, there are also 3 report forms for applicant testers.
Main pages
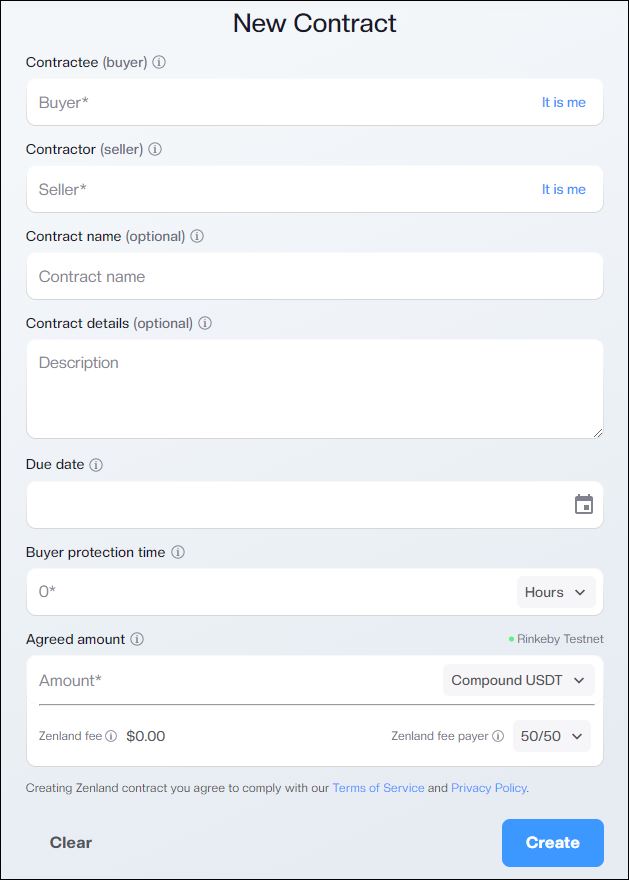
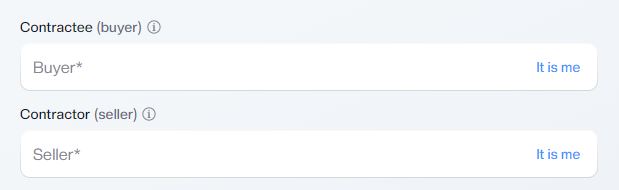
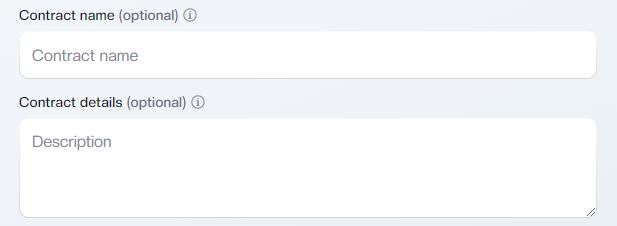
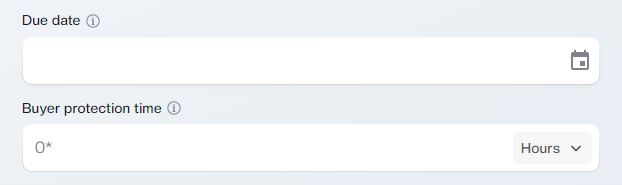
Create contact page
It is the first page on the navigation panel that is open by default. It contains the “New Contract” form that is filled by either side (a buyer or a seller). Once filled out, the contract is in the “Draft” state and can be seen on the “Contracts” page. The form has tooltips (info dialog boxes) to guide you through the contract terms. Read how to fill it out correctly here.
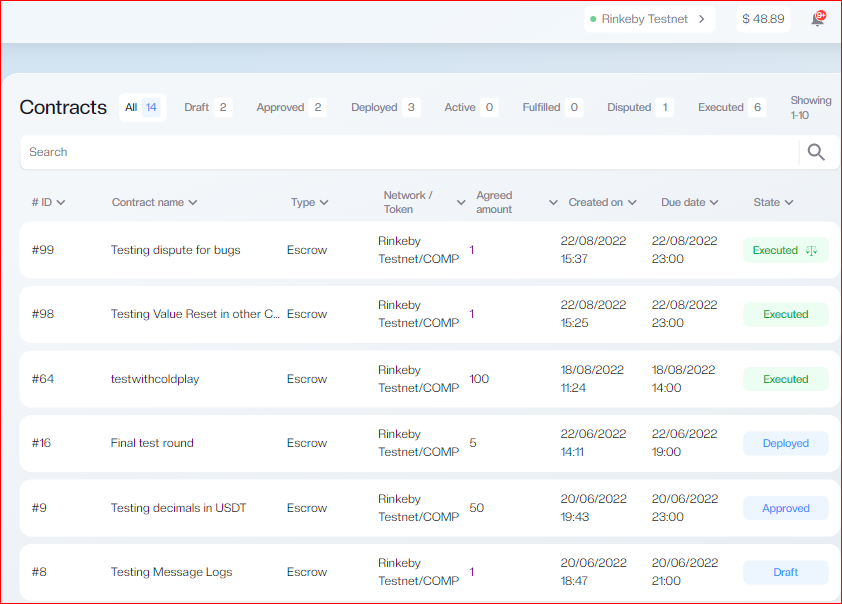
Contracts page
All your contracts created, approved, deployed, fulfilled, disputed, and executed will show up here. Contracts can be filtered by contract state, or sorted from top to bottom or bottom to top by dates, the agreed amount, contract ID, name, or network/token.
Documentation
A click on Documentation leads to https://docs.zen.land where everything about the escrow process and its participants is explained in detail. This is not developer documentation and is intended for users with little knowledge of blockchain escrow. There you’ll learn more about smart contracts, blockchain networks and tokens, and blockchain explorers to give you a solid foundation for why Zenland escrow app was built. The major difference between this knowledge base and documentation is in its purpose. The knowledge base has less detailed and more practical answers to common questions and issues users encounter. Documentation, on the other hand, expands on them teaching you why the escrow app is built the way it is.
Top panel
Top panel is where you switch your network, see in-app balance, do a quick check on notifications, and access the Menu tab for more pages.
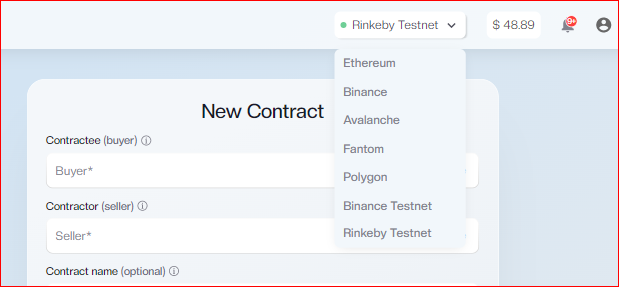
Network dropdown
Let’s say you have logged in with Ethereum, but want to create and deploy (publish) an escrow contract to Binance. You have two options to switch a network:
- Change it in Metamask first, and then, log in again.
- From the Top panel, click on Ethereum, and select Binance from the dropdown.
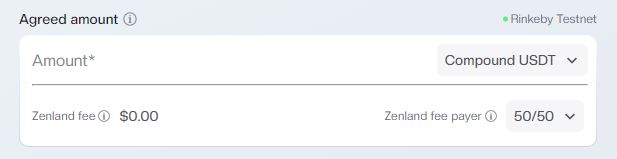
Important!The selected network and token cannot be changed after you click the "Create" button. Make sure you and another person you are dealing with (a buyer/seller) both agree on which network and token to use. Also, transaction gas fees vary depending on a network with Ethereum being the most expensive. For other questions about token/network refer to its category.
Balance display
The top panel also displays your running balance in the internal (in-app) wallet. The Zenland fee (for service) is deducted from this balance. If the buyer and seller decide to split the fee (50/50), they both must have enough balance to pay. Otherwise, the contract may not be deployed. For more read how funds can be added to an internal wallet.
Notifications
The bell icon on the Top panel opens up the Notifications dialogue with your most recent notifications. Clicking “All Notifications” will take you to the Notifications page to see all you have received since your first login with a particular Metamask address.
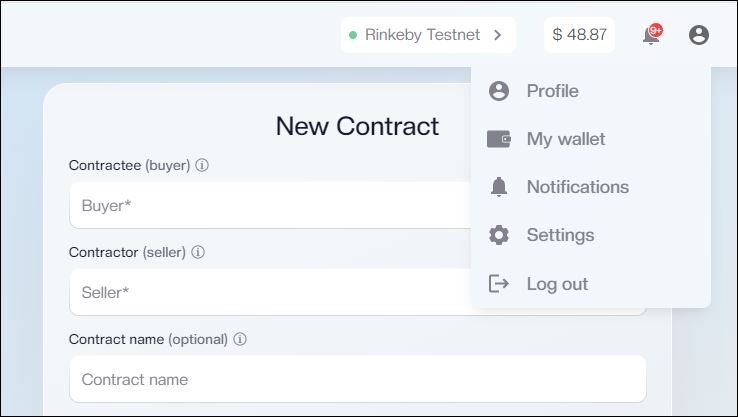
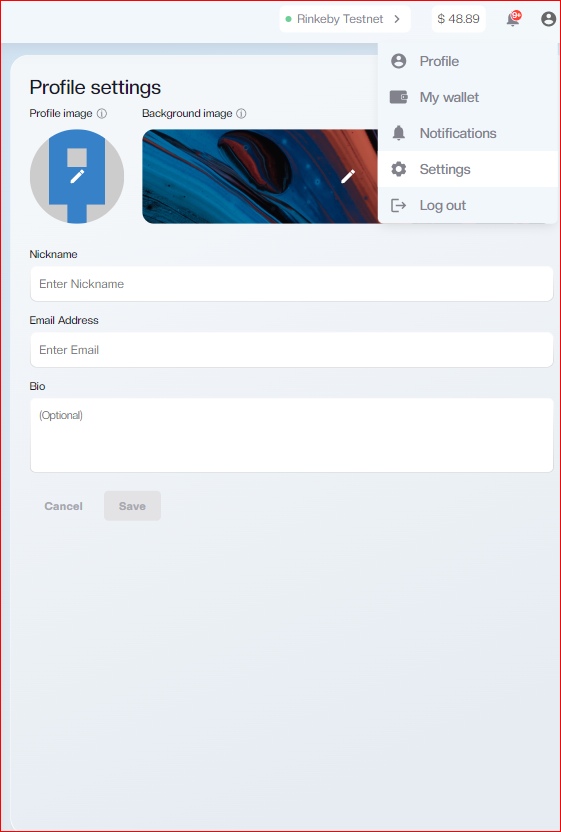
Menu tab
In the top right corner of the Top panel is a profile icon. Clicking on it opens up a Menu tab, from where you choose other pages You may go to your profile, wallet, notifications, or settings pages.
Other pages
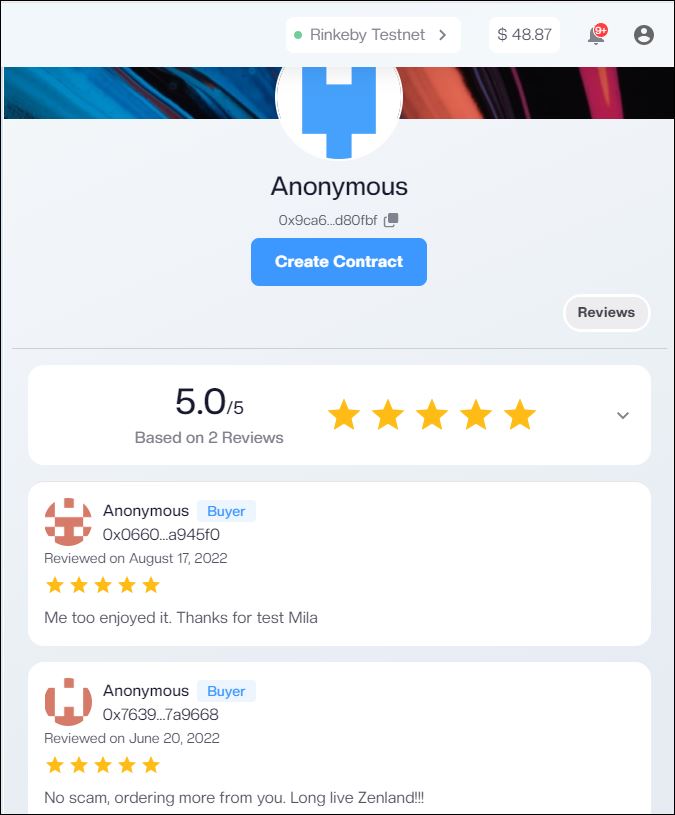
Profile page
A user profile page displays his/her rating based on the reviews received from other users who had contracts with that user. Profile pages are public and can be seen by anyone knowing your Metamask address without the need to log in. More questions and answers are in the “Zenland profile & wallet” category.
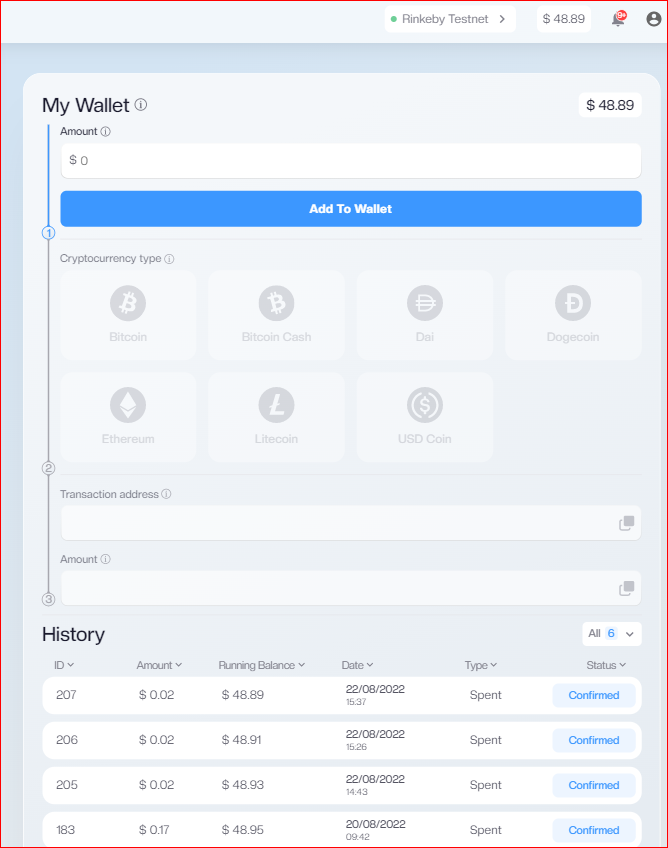
Wallet page
This is your internal (in-app) wallet from where you pay a service fee for creating an escrow contract. It consists of two parts: the input fields and the transaction history. The records show “Deposit” when the funds were added to a wallet, and “Spent” when the Zenland fee was deducted for every new contract. The running balance is also shown here along with the filters for all amounts deposited and spent.
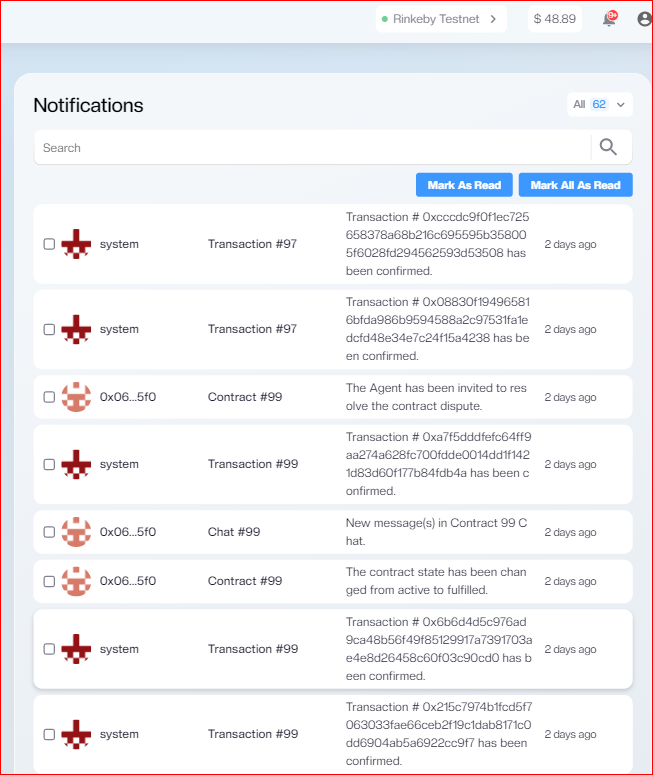
Notifications page
The page displays a list of different notifications associated with your account.
In general, there are 4 types of notifications:
- Contract notifications (changes to terms, contract state, and all contract operations).
- Chat notifications (new messages in specific contract chat).
- Wallet (when funds are deposited and deducted to pay a Zenland fee for the contract(s)).
- Transaction (with the address of every blockchain transaction associated with a specific contract ID).
Clicking on a particular one should take you to the relevant contract or chat depending on the displayed contract or chat ID. Wallet notifications will redirect to the “My Wallet” page.
Settings page
The settings page is an additional page where users can add or delete the information displayed on the profile page. Changes may include adding a nickname instead of the default “Anonymous” assigned on your first login, entering an email address, or bio, and uploading a profile and/or background images.
You’ve seen it all! You can try an escrow now, or see how Zenland works to learn more about the process.
Contract Control page
It is the next page that opens up once you click the “Create” button. The top of it contains the contract terms that both parties should approve before proceeding with the contract.
The page outlines the process with 4 simple steps:
- Contract Approval (the equivalent of signing a contract),
- Deployment (a.i. publication to blockchain network),
- Transfer (the agreed payment is transferred into the contract on the blockchain),
- Fulfillment (seller delivers the product/service and buyer releases the payment from contract to seller’s address).
The contract is controlled through a series of commands known as contract actions which update the contract state at every stage.
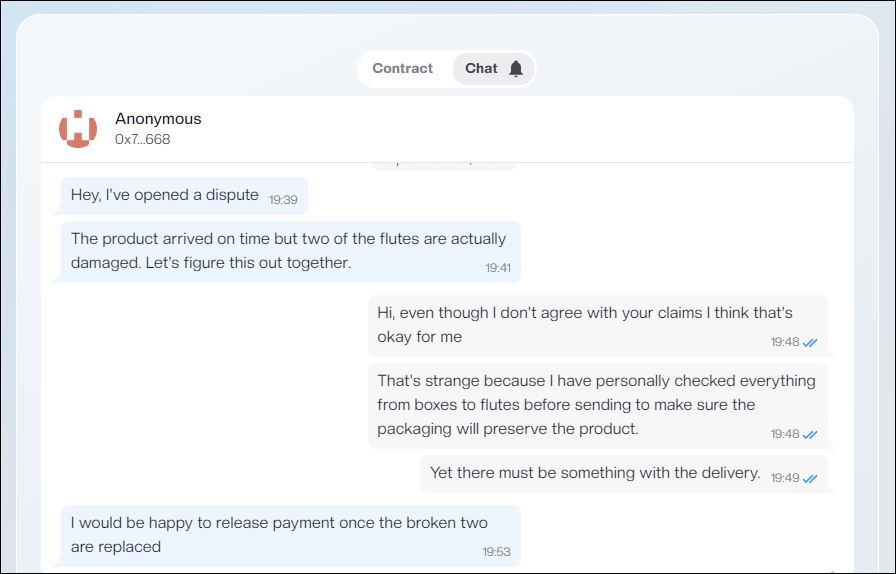
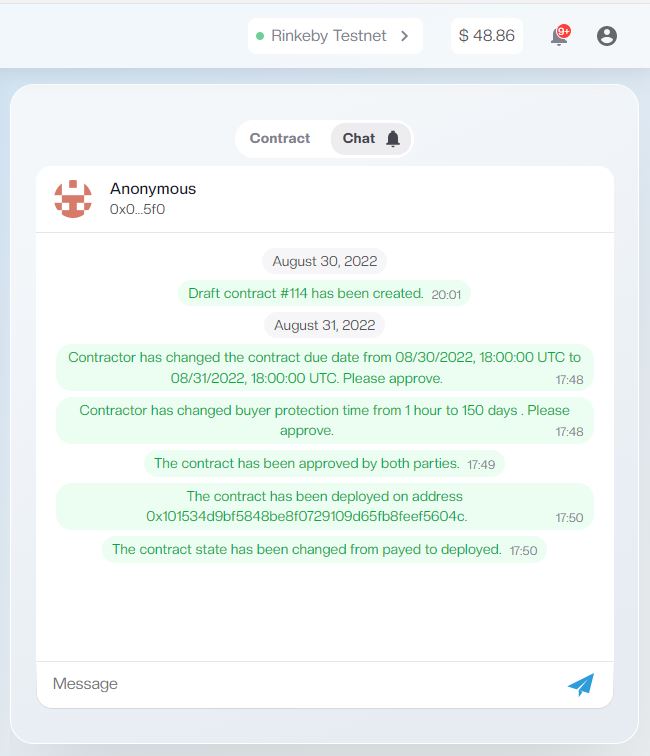
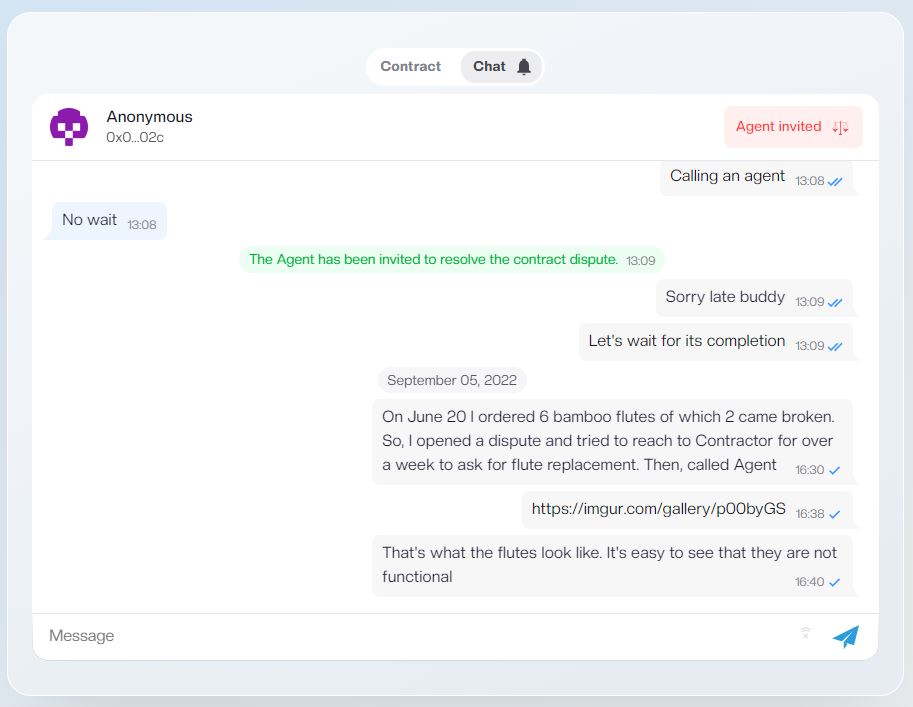
Contract Chat
Every action and state is timestamped in the Chat message logs, automatic system messages on changes made to a contract by both parties. When a new action is taken, the Chat tab (next to the Contract tab) will display a red indicator.